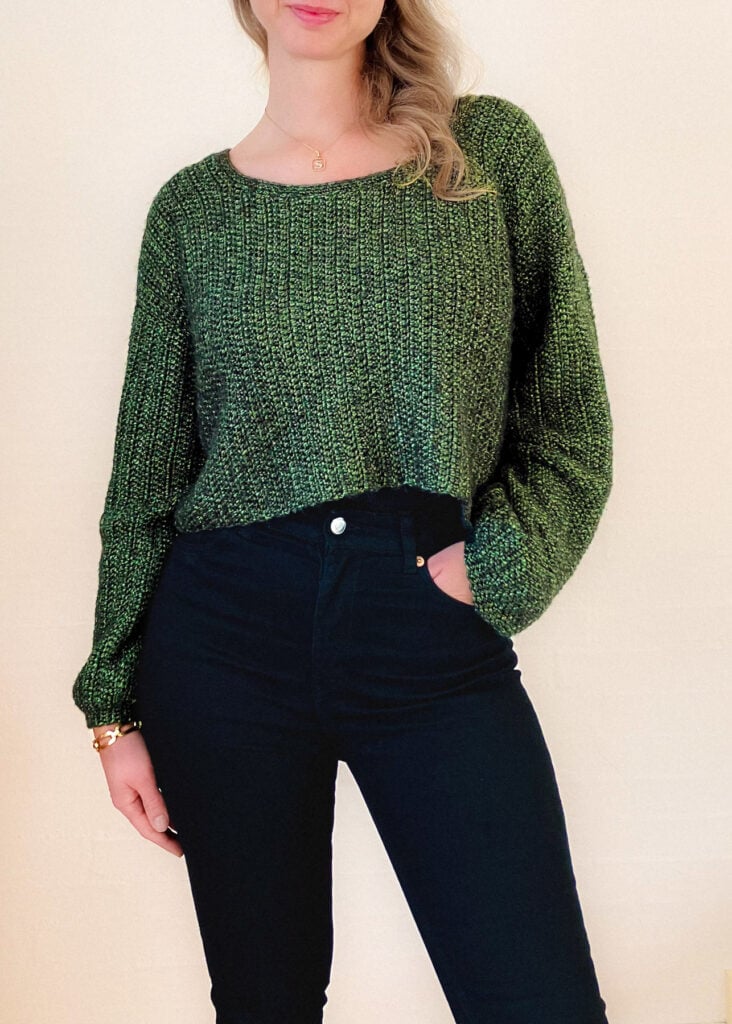
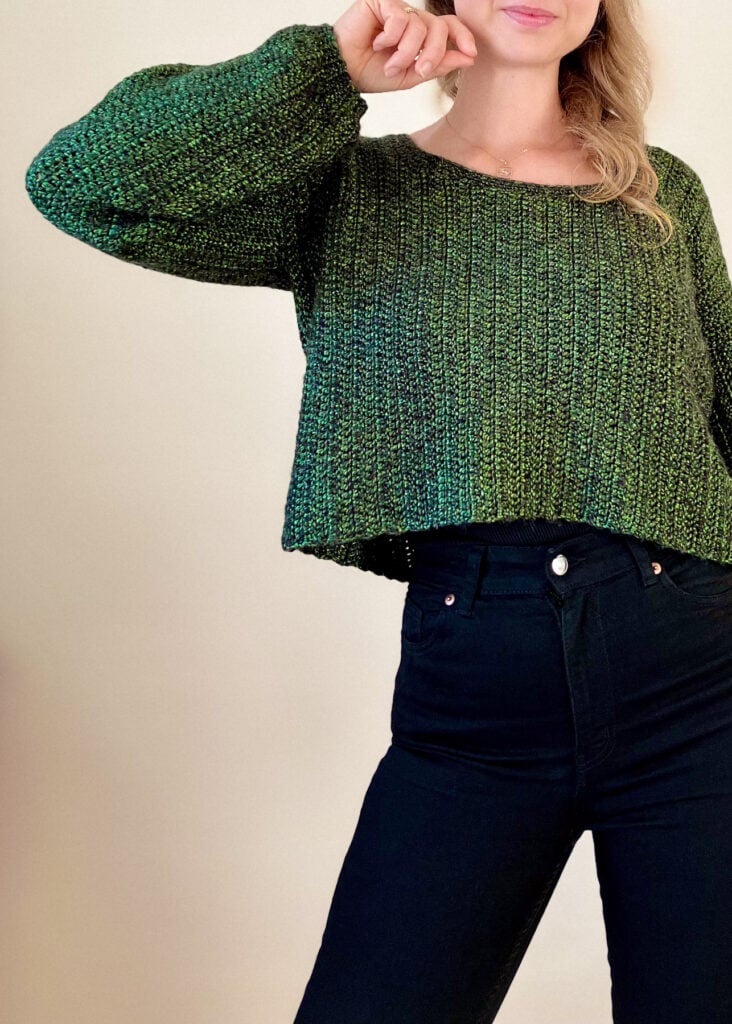
Easy Crochet Crop Sweater – perfect for beginners in 2026
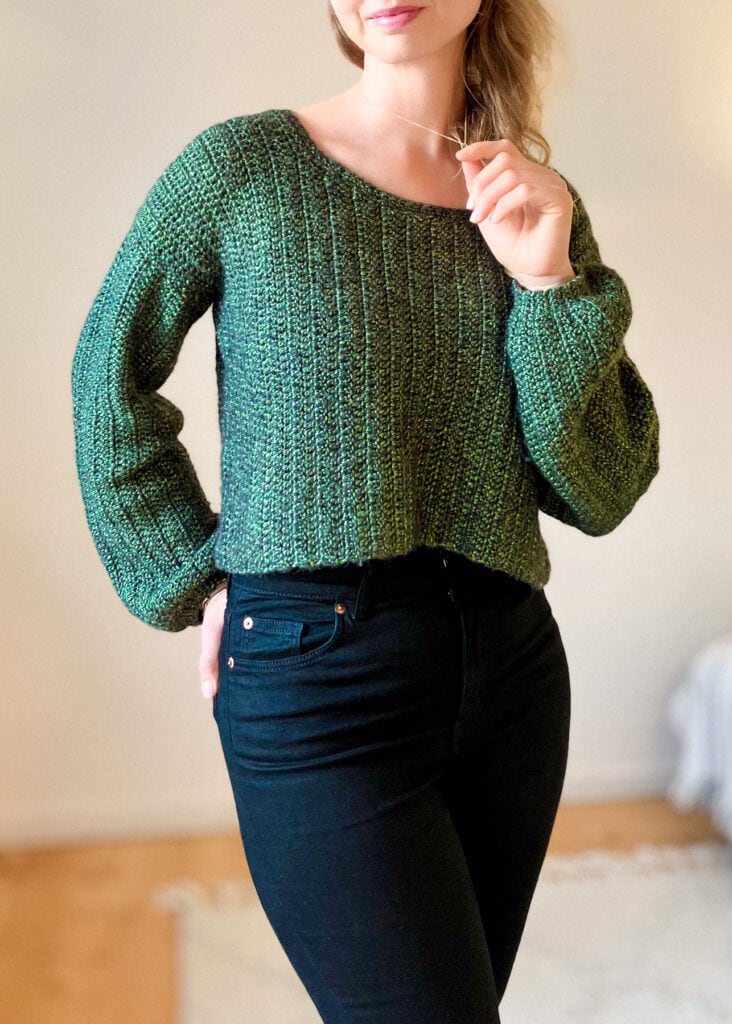
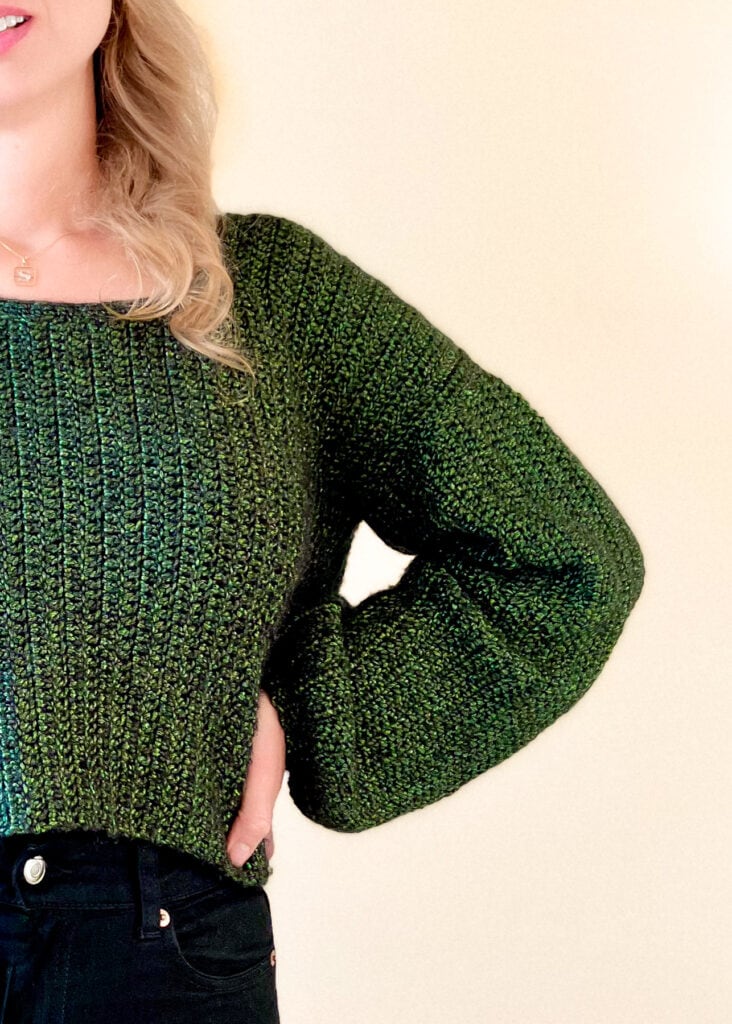
Looking to make a new crochet sweater for 2026? Then check out the Aiden Sweater pattern! It’s a beginner-friendly and very easy crochet crop sweater pattern featuring a comfy, boxy fit and cute sleeves with a slight balloon shape.
Get the free pattern below or purchase the ad-free printable PDF: My store (best price), Etsy or Ravelry
This site contains affiliate links. Please read full disclosure here.
The perfect crochet sweater pattern for beginners
If you’re ready to make your first crochet crop sweater this is a great pattern to start with since there are no special stitches or hard-to-understand crochet terms. Instead, you’ll find easy instructions and pictures that guide you through the entire pattern step by step.
The crop crochet sweater is super versatile and looks cute with jeans, shorts, a dress, and a skirt. It’s trendy all year round and you can pair it with everything. You can layer it with other garments for a different look, but also to stay warm in the colder parts of the year. And it’s both easy and super fun to make ☺️
Already loving it? Let’s make it together!
PIN ME FOR LATER!

Inspiration for the Aiden Crochet Crop Sweater
When The Everyday Easy Crochet Cardigan was published you guys loved it 🥰 It’s very beginner-friendly and is the inspiration for this crochet sweater pattern.
This crop sweater pattern features some of the same cute shapes and cropped look you all loved so much and like the cardigan, it’s made for the beginner who wants to make their first ever sweater.
The Aiden Sweater is very versatile and you’re gonna love wearing it and making it since it’s so easy, straightforward, and looks really good.
Construction
The Aiden Sweater is constructed in a super easy way and made for absolute beginners. Therefore there are no special stitches or hard-to-understand crochet terms and instructions.
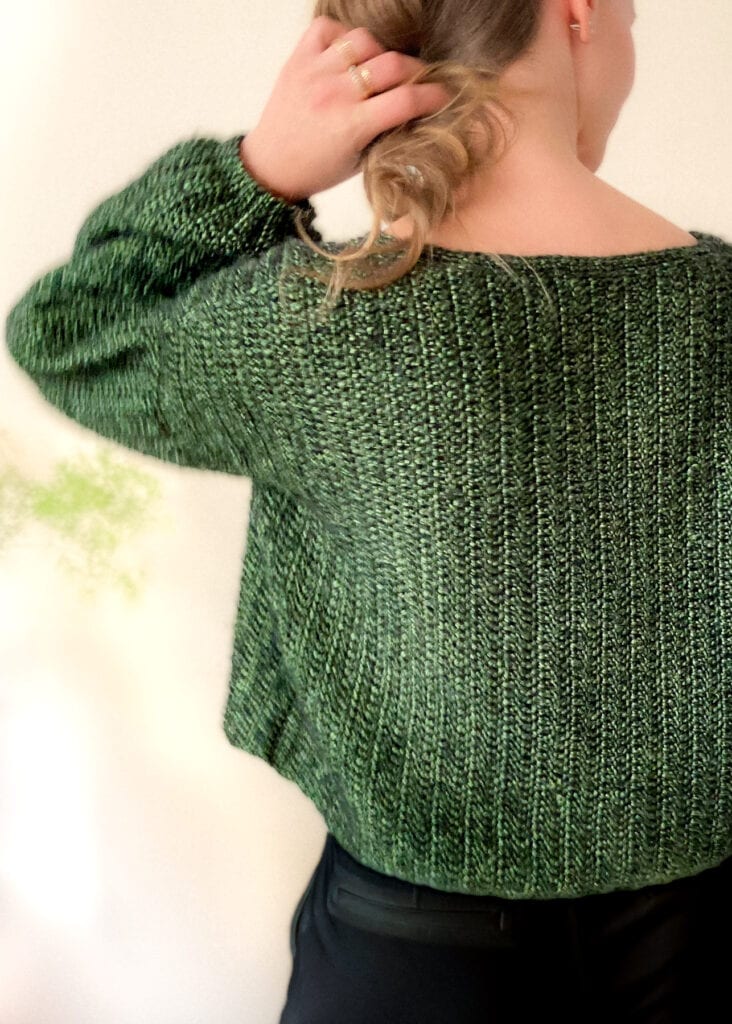
The sweater is made from a front panel, a back panel and two sleeves. They are all worked in rows using a super simple 1 and 2 row repeat.
All pieces are worked from side to side.
You start by making the front panel and then the back panel. Then you make the sleeves.
When you’re done crocheting all the parts you sew them together. Then, if you like, you crochet a few rows directly on the neckline to shape it. And then you’re done ☺️
Prefer a clean printable version? Purchase the ad-free, printable PDF on My store (best price), Etsy or Ravelry 🧶☺️
Skill level
Beginner
Sizing and measurements
These are the finished measurements of your garment, not your body measurements. Keep in mind that the Aiden Sweater is a loose fitted and cropped garment. Nonetheless, choose the size that matches the measurement and the look you’re going for.
Size S (M) L (XL) 2XL
Sizes in inches:
Length – measured from neck to bottom:
16.5 (17.3) 19 (19.7) 21.3
Width – measured just below the sleeves:
21.7 (22.5) 24.4 (26.4) 28.7
Sleeve length – measured towards wrist:
18 (18) 19 (19.7) 20.5
Sizes in cm:
Length – measured from neck to bottom:
42 (44) 48 (50) 54
Width – measured just below the sleeves:
55 (57) 62 (67) 73
Sleeve length – measured towards wrist:
46 (46) 48 (50) 52
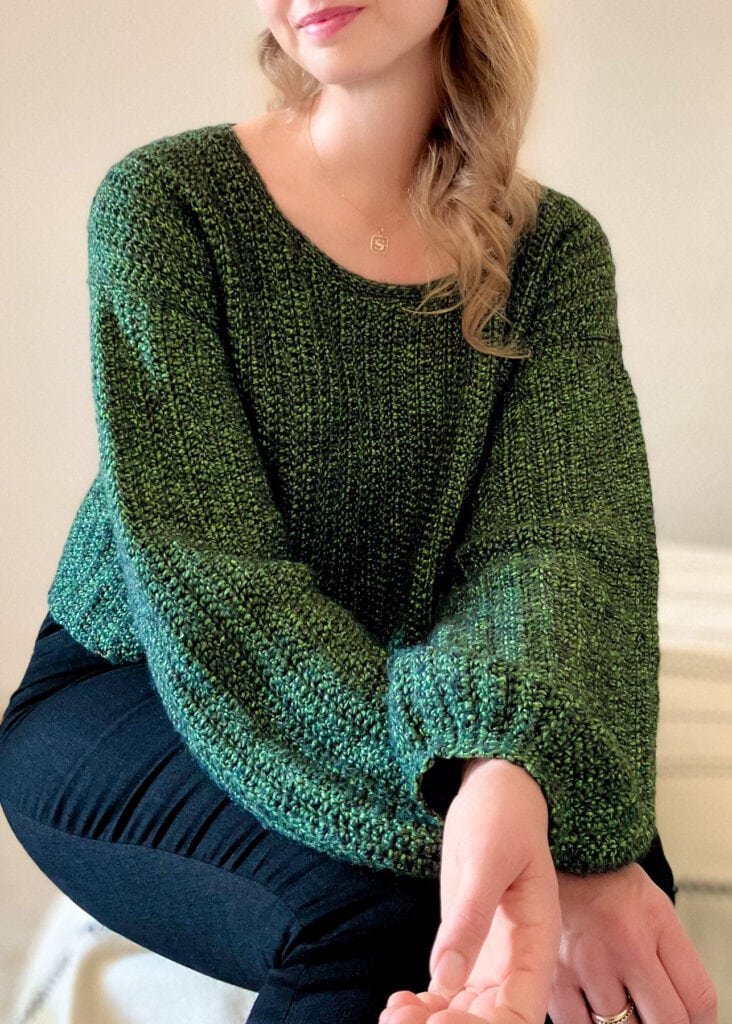
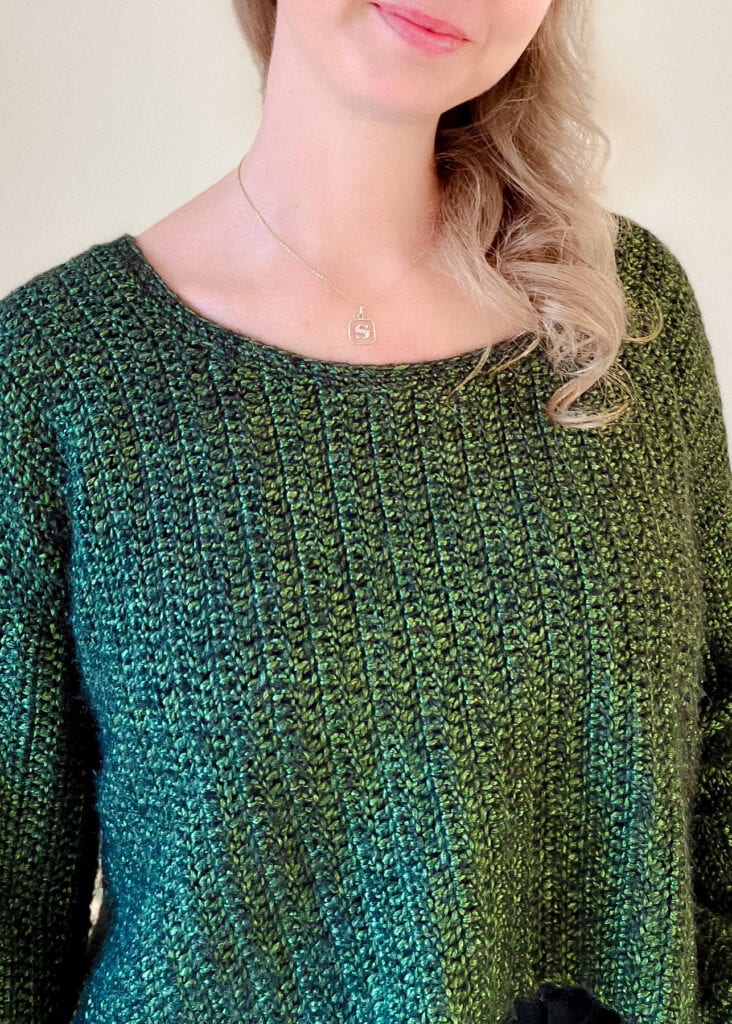
The model in the pictures is wearing a size M of this cute crochet jumper pattern.
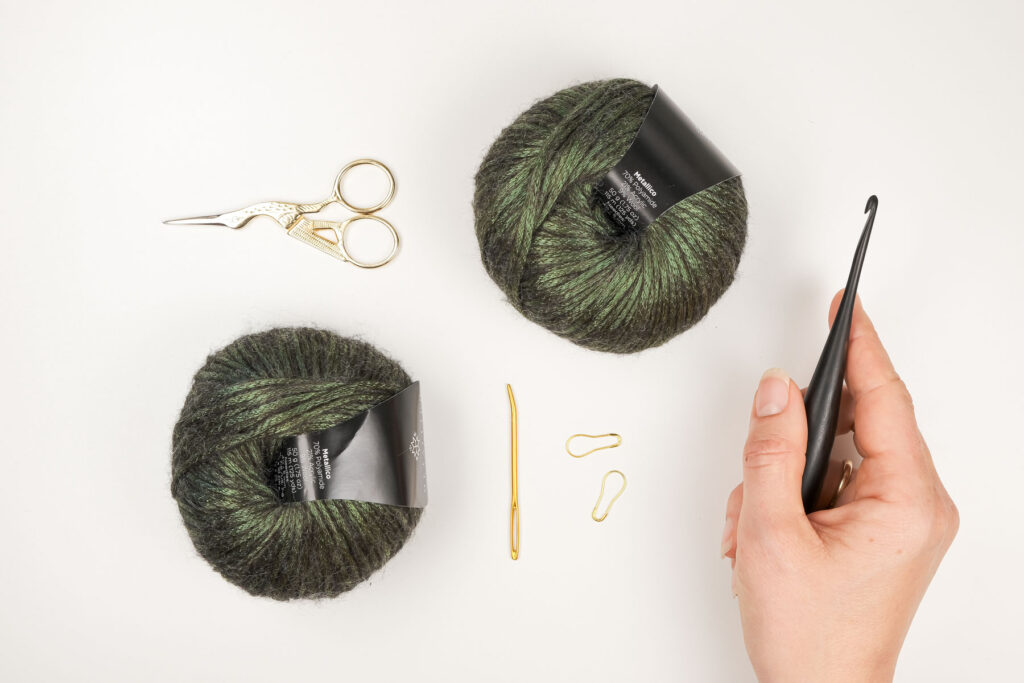
Tools
I’ve linked the ones I like to use right here:
Crochet hook 4 mm
Darning needle
Scissors
Stitch markers
Yarn
Hobbii Metallico
Yardage: 50 grams = 115 meters (126 yds)
Color code: Green (11)
The yarn is a polyamide, acrylic and wool blend with a beautiful shine to it. Even though it has a metallic effect it’s super soft and smooth to work with and feels nice to wear.
MATERIALS
S: 10 skeins
M: 11 skeins
L: 13 skeins
XL: 15 skeins
2XL: 16 skeins
ALTERNATIVES
Other Worsted / Aran / 10 ply / 4-weight yarn.
Gauge
(This is an expression of how tight your work is)
4” / 10cm square = 17 stitches wide x 9 rows tall in double crochet using hook size 4 mm
Always make a test before you begin. If the gauge does not match the specified crochet hook, try changing to a larger or smaller one so that you find the hook with which you can achieve the specified gauge.
Pattern notes
Stitch counts for the different sizes are written in the order:
S (M) L (XL) 2XL
At the end of each row you can see the total number of stitches for each size as follows:
E.g. for the sleeves:
[ 72 (73) 76 (79) 82 ]
Notes for the body panels:
- When you start in 3rd chain from the hook on row 1 these chains will count as 1 hdc.
- When you start in 4th chain from the hook on row 3 these chains will count as 1 hdc.
Note that the ch 2 in end of each row on both the front and back panel and the sleeves counts as 1 dc on the next row.
Always read the pattern thoroughly. You will find an explanation of all abbreviations below, both US and UK terms. The pattern uses US terms.
ABBREVIATIONS
st(s): stitch(es)
ch: chain
sc: single crochet (UK double crochet)
dc: double crochet (UK treble crochet)
rnd(s): round(s)
Pssst! Download the FREE Crochet Stitch Abbreviation Guide. It contains information about abbreviations in 6 different languages.
Share your projects
I love to see your finished projects and WIPs! Use #aidensweater #yippieyarnyay and tag @yippieyarnyay on social media to show off your work and your process while you’re crocheting.
Now it’s time to crochet your very own easy crop sweater ❤︎
Looking for more free crochet patterns?


Easy crochet crop sweater patterns instructions
Body
The body consists of two parts: a front panel and a back panel. Both panels are worked from side to side. Start by making the front panel and then the back panel.
Front panel
Use hook 4 mm. Worked in the rows.
Ch 67 (70) 75 (80) 86.
Row 1: Start in 3rd ch from the hook. Make 1 dc in each st across, turn [ 66 (69) 74 (79) 85 ]
Row 2: Ch 2, start in 4th ch from the hook. Make 1 dc in each st across, turn [ 66 (69) 74 (80) 85 ]
Repeat row 2: 12(13) 15 (17) 19 times
Once you’re done with row 12 it’s time to shape the neckline of your crochet sweater.
Decrease
Row 1: Ch 2, start in 4th ch from the hook. Make 1 dc in next 51 (54) 59 (65) 70 sts. Leave the rest of the sts, turn [ 52 (55) 60 (66) 71 ]
Row 2: Ch 2, start in 4th ch from the hook. Dc 2 together. Make 1 dc in each st across, turn [ 51 (54) 59 (65) 70 ]
Row 3: Ch 2, start in 4th ch from the hook. Make 1 dc in next 49 (52) 57 (63) 68, leave the ch 2 from previous row, turn [ 50 (53) 58 (64) 69 ]
Row 4: Ch 2, start in 4th ch from the hook. Dc 2 together. Make 1 dc in each st across, turn [ 49 (52) 57 (63) 68 ]
Row 5: Ch 2, start in 4th ch from the hook. Make 1 dc in next 47 (50) 55 (61) 66, leave the ch 2 from previous row, turn [ 48 (51) 56 (62) 67 ]
Row 6: Ch 2, start in 4th ch from the hook. Dc 2 together. Make 1 dc in each st across, turn [ 47 (50) 55 (61) 66 ]
Row 7: Ch 2, start in 4th ch from the hook. Make 1 dc in next 45 (48) 53 (59) 64, leave the ch 2 from previous row, turn [46 (49) 54 (60) 65 ]
Row 8: Ch 2, start in 4th ch from the hook. Make 1 dc in each st across, turn [46 (49) 54 (60) 65 ]
Repeat row 8: 7(7) 7 (9) 9 times
Increase
Row 1: Ch 2, start in 4th ch from the hook. 2 dc in next st. Make 1 dc in each st across, turn [ 47 (50) 55 (61) 66 ]
Row 2: Ch 2, start in 4th ch from the hook. Make 1 dc in next 45 (48) 53 (59) 64, 2 dc in ch 2 from previous row, turn [ 48 (51) 56 (62) 67 ]
Row 3: Ch 2, start in 4th ch from the hook. 2 dc in next st. Make 1 dc in each st across, turn [ 49 (52) 57 (63) 68 ]
Row 4: Ch 2, start in 4th ch from the hook. Make 1 dc in next 47 (50) 55 (61) 66, 2 dc in ch 2 from previous row, turn [ 50 (53) 58 (64) 69 ]
Row 6: Ch 2, start in 4th ch from the hook. 2 dc in next st. Make 1 dc in each st across, turn [ 51 (54) 59 (65) 70 ]
Row 7: Ch 2, start in 4th ch from the hook. Make 1 dc in next 49 (52) 57 (63) 68, 2 dc in ch 2 from previous row, turn [ 52 (55) 60 (66) 71 ]
When you’re done shaping the neckline continue making the shoulder like this:
Ch 15, turn.
Row 1: Start in 3rd ch from the hook. Make 1 dc in each st across, turn [ 66 (69) 74 (79) 85 ]
Row 2: Ch 2, start in 4th ch from the hook. Make 1 dc in each st across, turn [ 66 (69) 74 (79) 85 ]
Repeat row 2: 12(13) 15 (17) 19 times
You now have the following number of rows for the front panel of your crochet sweater:
S: 49
M: 51
L: 55
XL: 61
2XL: 65
Break yarn and weave in ends.
Back panel
Use hook 4 mm. Worked in the rows.
Ch 67 (70) 75 (80) 86.
Row 1: Start in 3rd ch from the hook. Make 1 dc in each st across, turn [ 66 (69) 74 (79) 85 ]
Row 2: Ch 2, start in 4th ch from the hook. Make 1 dc in each st across, turn [ 66 (69) 74 (79) 85 ]
Repeat row 2: 47 (49) 54 (59) 64 times
You now have the following number of rows for the back panel:
S: 49
M: 51
L: 55
XL: 61
2XL: 65
Break yarn and weave in ends.
Sleeves
Make 2.
Use hook 4 mm. Worked in the rows. Both sleeves are worked from side to side.
Ch 73 (74) 77 (80) 83.
Row 1: Start in 3rd ch from the hook. Make 1 dc in the next 66 (67) 69 (72) 74 sts. Make 1 sc in the last 4 (4) 5 (5) 6 sts, turn [ 72 (73) 76 (79) 82 ]
Row 2: Ch 1, make 1 sc in the first 4 (4) 5 (5) 6 sts. Make 1 dc in the next 68 (69) 71 (74) 76 sts, turn [ 72 (73) 76 (79) 82 ]
Row 3: Ch 2, start in 4th ch from the hook. Make 1 dc in the next 67 (68) 70 (73) 75 sts. Make 1 sc in the last 4 (4) 5 (5) 6 sts, turn [ 72 (73) 76 (79) 82 ]
Repeat row 2 and 3: 32(32) 36 (38) 40 times
Repeat row 2 once more.
You now have the following number of rows for the size:
S: 36
M: 36
L: 40
XL: 42
2XL: 44
Break yarn and leave a tail, approx. 59’’ / 150 cm, for attaching the sleeve to the body of the sweater.
Assembly
Now it’s time to sew your sweater together.
Start with the body panels
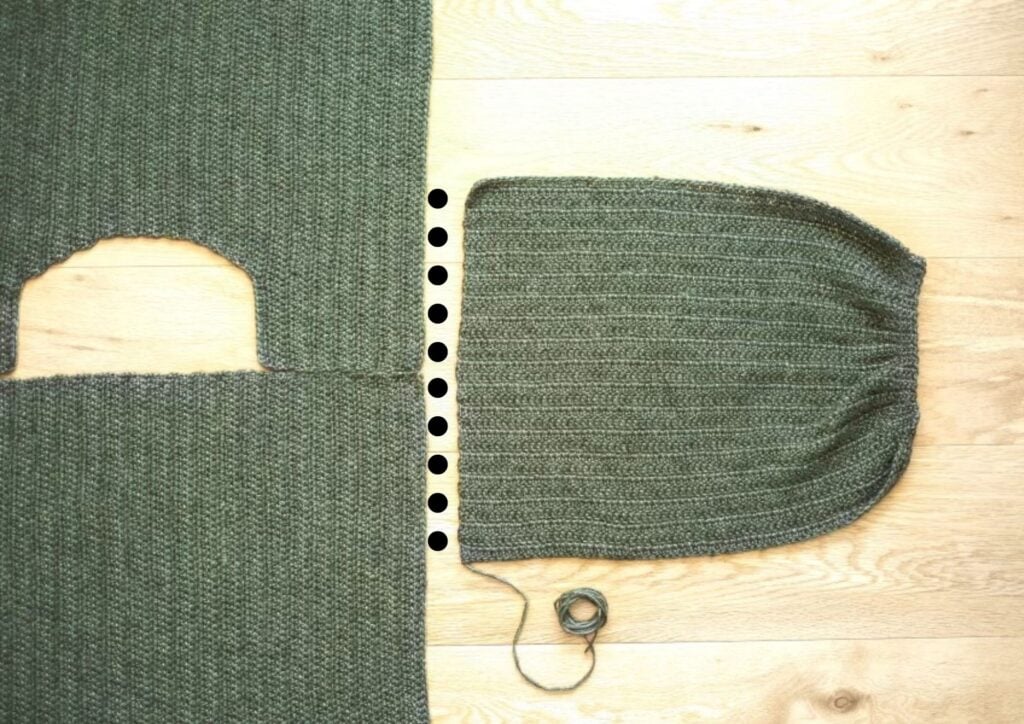
Lay the front panel on top of the back panel as the picture below shows.
Remember, there are no right or wrong sides to your panels which makes it all so much easier. All you have to do is make sure that you choose the same side of all the panels as the right and wrong sides.
Thread a darning needle with a leftover piece of yarn, approx. 24” / 60 cm.
Now whip stitch the shoulders together as shown in the picture below.

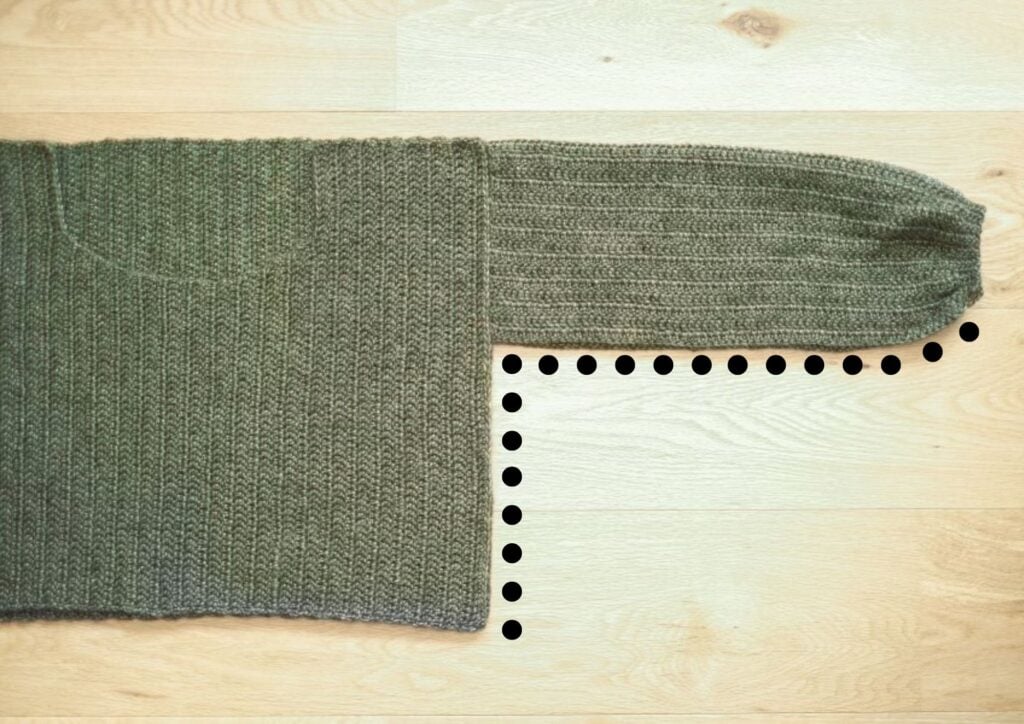
Attaching the sleeves
Now find the exact middle of your sleeves and then mark it with a stitch marker. Make sure that the middle of the sleeves (where the stitch markers are) are exactly where the shoulders are sewn together.
Thread a darning needle with the tail of yarn you left on both sleeves.
Whip stitch the sleeves on as shown in the picture below.
Finishing the sweater
Now fold your sweater. Thread a darning needle with a piece of yarn, approx. 79” / 200 cm.
Whip stitch the sleeves and body panels together. Start at the wrist of the sleeves.
Once you have sewn them together turn your work inside out. This is now the right side of your sweater.
If you like, continue making the neckline of the sweater.
Neckline (optional)
Use hook 4 mm. Worked in the rnds.
Work on the right side.
Add the yarn approx. in the middle along the neckline on the back panel.
Rnd 1: Sc in each st across until you reach the st you started. When crocheting in dc rows and not a specific st make approx. 3 sts per 2 dc rows. The most important thing is not the number of sts but that your work looks smooth when it lays flat.
Do not turn.
Rnd 2 and 3: Sc in each st across.
Break yarn and weave in ends.
Share your finished easy crochet crop sweater
Happy crocheting! 🧶✨
xx Sharlene
If you enjoyed this pattern, you may also like these patterns:
- The Chunky Balloon Sweater – So easy, so warm
- The Cadence Cardigan – Gorgeous color block cardi
- Everyday Easy Crochet Cardigan – Perfect for beginners
- The Super Easy Crochet Beanie
- Monday Sweater – Chunky and cozy
Follow me:
Sharing is caring:
Loved this pattern though the sleeves turned out real long. Still I’d make it again and just shorten them some. Gave it as a gift. I can’t seem to attach a pic though.
Hi. Thank you so much for your comment! I’m really happy you like the pattern. No, unfortunately you can’t share a picture together with your comment, but I’d love to see it on social – just use #aidensweater and @yippieyarnyay. I hope to hear from you 😀
when you say ‘Ch 2, start in 4th ch from the hook’, do you mean for us to start in the 2nd stitch? the 4th stitch? im confused as there are only two chains and the stitch count doesn’t seem to change…
Hi Jayne,
Thank you for your question. Yes, the stitch count doesn’t change. You count the 2 chains you make, and then 2 stitches more – then you’ll find the stitch you’ll be starting in. I hope this makes sense. Please let me know how it goes, and if you have any other questions.
Happy crocheting,
Sharlene