Easy Long Crochet Cardigan Pattern For Beginners: The Milani Cardigan
Looking for a cozy, beginner-friendly crochet cardigan pattern? Meet the Milani Cardigan – it’s simple, versatile, and perfect for all-year wear. Whether you’re brand new to crochet or just looking for a relaxing project, this long cardigan pattern has you covered (literally!).
Get the free pattern below or purchase the ad-free printable PDF: my store (best price), Etsy or Ravelry.

This site contains affiliate links. Please read full disclosure here.
A long crochet cardigan pattern for everyone
This long crochet cardigan pattern is a dream for beginner crocheters. With its very simple construction and basic stitches, it’s designed to be as stress-free as possible. There are no hard-to-understand crochet terms, constant counting, or special stitches – you can just relax and enjoy the process.
The long, cozy fit adds so much comfort, while handy pockets make it practical for everyday use. Whether you’re lounging at home, running errands, or heading out for a casual dinner, the Milani Cardigan is the perfect choice 🥰
why You’ll Love This crochet Cardigan pattern:
- Beginner-Friendly: Perfect for all skill levels, with simple stitches and no complicated terms.
- Cozy and Functional: The long fit and handy pockets make it both practical and comfortable for everyday wear.
- Style Versatility: Pair it with a dress, jeans, or even your favorite pajamas.
- All-Season Appeal: Lightweight enough for spring (and summer), warm enough for fall and winter.
This cute crochet cardigan pattern is the perfect project to dive into! ✨
PIN ME FOR LATER!

The Inspiration for the Milani Crochet Cardigan
When I set out to design the Milani Cardigan, my goal was simple:
To create something that anyone could make and everyone would want to wear.
I wanted to make a beginner-friendly cardigan that wasn’t just easy to crochet but also felt like wrapping yourself in a warm hug. It also had to be cozy enough for relaxing at home, yet versatile and stylish enough to pair with practically anything in your wardrobe.
I envisioned a long, soft cardigan you could throw over a dress in the spring, snuggle into on a cool summer evening, or layer with jeans and a scarf during the more chilly fall and winter months.
The Milani Cardigan is the result – a wearable, timeless, easy crochet design that’s as practical and cozy as it’s beautiful 🥰

Construction
The Milani Cardigan is crocheted in a very easy way. All you have to make is two front panels, one back panel, two sleeves, two pockets (optional) and the ribbings. You crochet all the main parts of the cardigan only using half double crochet. The ribbings are all made from single crochet in back loop only.
So as you see, this long pretty cardigan is a wonderfully easy and beginner-friendly crochet project 🥰
The entire cardigan is worked with two strands of the same type of yarn held together (more on yarn below ☺️)
To begin with you make the front panels, the back panel and the sleeves and sew these finished parts together. Then you crochet the ribbing along the bottom of the cardigan directly on to your cardigan and make the ribbing for the opening of your cardigan and sew it on.
Then make the pockets (if you like). Sew them on and you’re done 😊

Personal adjustments
Small changes can make a big difference when you crochet a long cardigan, and that’s why the pattern includes guidance for:
- Body panels and pockets: Add as many rows you like until you reach the desired length.
- The sleeves: Add more rows before the first decrease row.
- Optional pockets: If you’re not the pocket type, simply don’t add them to your cardigan.

Prefer a clean printable version? Purchase the ad-free, printable PDF on my store (best price), Etsy or Ravelry 🧶☺️
Skill level
Advanced beginners / Lower intermediate
Sizing and measurements
These are the finished measurements of your garment, not your body measurements. Keep in mind that the Milani Cardigan is an loose-fitted crochet garment with positive ease.
Pattern includes 6 sizes:
Sizes S (M) L (XL) 2XL (3XL)
Sizes in inches:
Width – measured just below the sleeves: 22 (24) 26 (28) 30 (32)
To fit bust: 34 (38) 42 (46) 50 (54)
Length – measured from neck to bottom: 32.5 (33.5) 34 (35) 35.5 (36)
Sleeve length – measured towards wrist: 17 (17.5) 17.5 (18) 18 (18.5)
Sizes in cm:
Width – measured just below the sleeves: 56 (61) 66 (71) 76 (81)
To fit bust: 86 (96) 107 (117) 127 (137)
Length – measured from neck to bottom: 82.5 (85) 86 (89) 90 (92)
Sleeve length – measured towards wrist: 43 (44) 44 (45.5) 45.5 (47)
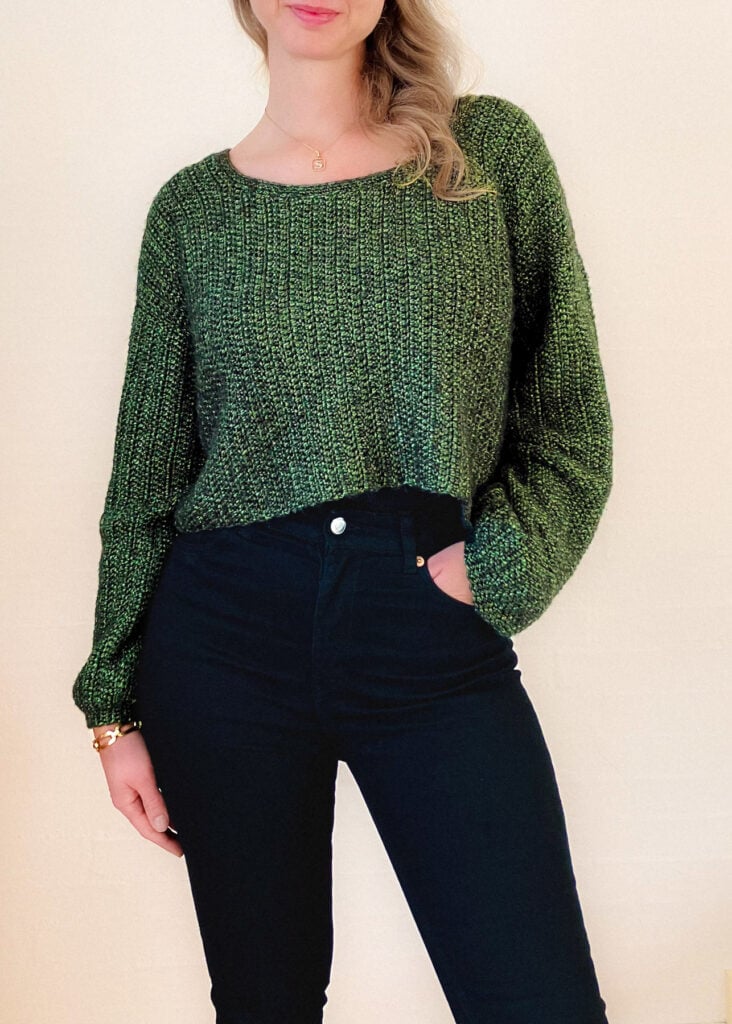
The model in the pictures is wearing a size M of this beginner-friendly crochet cardigan.
Tools
I’ve linked the ones I like to use right here:
Crochet hooks 6 mm and 7 mm
Darning needle
Scissors
Pins for sewing (or Stitch markers)

Yarn
Hobbii Friend Extra Fine Merino
Yardage: 50 grams = 165 meters (180 yds)
Color code: Off white (02)
Hobbii Friends Extra Fine Merino is such a soft yarn and it’s so wonderful to work with. When you work with two stands of yarn the gravity of this merino creates such a comforting feeling on your body.
MATERIALS
S: 14 skeins
M: 16 skeins
L: 18 skeins
XL: 18 skeins
2XL: 20 skeins
3XL: 22 skeins
ALTERNATIVES
Other Fine / Sport / 5 ply / 2-weight yarn – work with two strands of yarn held together.
If you prefer to crochet your Milani Cardigan in only one strand of yarn, look for Bulky / Chunky / 12 ply / 5-weight yarn.

Gauge
(This is an expression of how tight your work is)
4” / 10 cm square = 12 stitches wide x 9 rows tall in hdc using hook size 7 mm
4” / 10 cm square = 16 stitches wide x 16 rows tall in sc blo using hook size 6 mm (used for ribbings)
Always make a test before you begin. If the gauge does not match the specified crochet hook, try changing to a larger or smaller one so that you find the hook with which you can achieve the specified gauge.
Pattern notes
Stitch counts for the different sizes are written in the order:
S (M) L (XL) 2XL (3XL)
Stitch counts for the different sizes are written in the order:
E.g. for the back panel:
[ 59 (65) 71 (77) 83 (89) ]
You must crochet all the parts of the cardigan with two strands of yarn held together.
Note for the body panels and sleeves: The ch 1 in the end of each row does not count as 1 hdc. Do not make it too tight, or else the panels will wrinkle.
Note for the sleeves: The total number of times you repeat row 2 might seem off regarding sizes XL, 2XL and 3XL. But it is correct that the number of rows you make for these sizes is less than for sizes S, M and L. This is to make sure that the number of stitches in the end is suitable for each size and to make the ribbing fit nicely around the wrist.
Note about assembling: Use only one strand of yarn when you sew.
Note about pockets: After making the ribbing the ch 1 in the beginning of the row counts as 1 hdc.
Always read the pattern thoroughly. You will find an explanation of all abbreviations below, both US and UK terms. This crochet pattern uses US terms.

Abbreviations
st(s): stitch(es)
ch: chain
sc: single crochet (UK double crochet)
hdc: half double crochet (UK half treble crochet)
blo: back loop only
Pssst! Download the FREE Crochet Stitch Abbreviation Guide. It contains information about abbreviations in 6 different languages.
Share your projects
I love to see your finished projects and WIPs! Use #milanicardigan #yippieyarnyay and tag @yippieyarnyay on social media to show off your work and your process while you’re crocheting.

Looking for more free crochet patterns?


Long crochet cardigan pattern instructions
Body
The body consists of three parts: a left front panel, a right front panel and a back panel.
Work with two strands of yarn.
Front panels
Make 2 – a left and a right panel. The panels are identical. Use hook 7 mm.
Ch 21 (24) 27 (30) 33 (36). (The last 2 ch counts as 1 hdc)
Row 1: 1 hdc in 3rd ch from hook, 1 hdc in each st across, ch 1, turn [ 20 (23) 26 (29) 32 (35) ]
Row 2: 1 hdc in each st across, ch 1, turn [ 20 (23) 26 (29) 32 (35) ]
Repeat Row 2 until you have a total of 62 (64) 65 (67) 68 (70) rows
Break the yarn and weave in ends.
Back panel
Use hook 7 mm.
Ch 60 (66) 72 (78) 84 (90). (The last 2 ch counts as 1 hdc)
Row 1: 1 hdc in 3rd st from hook, 1 hdc in each st across, ch 1, turn [ 59 (65) 71 (77) 83 (89) ]
Row 2: 1 hdc in each st across, ch 1, turn [ 59 (65) 71 (77) 83 (89) ]
Repeat Row 2 until you have a total of 62 (64) 65 (67) 68 (70) rows
Break the yarn and weave in ends.
Sleeves
Work with two strands of yarn.
Make 2. Use hook 7 mm.
Ch 42 (42) 48 (54) 58 (62). (The last 2 ch counts as 1 hdc)
Row 1: 1 hdc in 3rd ch from hook, 1 hdc in each st across, ch 1, turn [ 41 (41) 47 (53) 57 (61) ]
Row 2: 1 hdc in each st across, ch 1, turn [ 41 41) 47 (53) 57 (61) ]
Repeat Row 2 until you have a total of14 (15) 15 (13) 13 (14) rows
Decrease
Row 1: Hdc 2 together, 1 hdc in each st across until you have 2 sts left, 2 hdc together, ch 1, turn [ 39 (39) 45 (51) 55 (59) ]
Row 2-4: 1 hdc in each st across, ch 1, turn [ 39 (39) 45 (51) 55 (59) ]
Row 5: Repeat decrease row 1 [ 37 (37) 43 (49) 53 (57) ]
Row 6-8: 1 hdc in each st across, ch 1, turn [ 37 (37) 43 (49) 53 (57) ]
Row 9: Repeat decrease row 1 [ 35 (35) 41 (47) 51 (55) ]
Row 10-12: 1 hdc in each st across, ch 1, turn [ 35 (35) 41 (47) 51 (55) ]
Row 13: Repeat decrease row 1 [ 33 (33) 39 (45) 49 (53) ]
Now follow the directions below for your chosen size.
Only for sizes S & M:
Row 14-16: 1 hdc in each st across, ch 1, turn [ 33 (33) ]
Row 17: Repeat decrease row 1 [ 31 (31) ]
Row 18-20: 1 hdc in each st across, ch 1, turn [ 31 (31) ]
Only for sizes L & XL:
Row 14: 1 hdc in each st across, ch 1, turn [ 39 (45) ]
Row 15: Repeat decrease row 1 [ 37 (43) ]
Row 16: 1 hdc in each st across, ch 1, turn [ 37 (43) ]
Row 17: Repeat decrease row 1 [ 35 (41) ]
Row 18: 1 hdc in each st across, ch 1, turn [ 35 (41) ]
Row 19: Repeat decrease row 1 [ 33 (39) ]
Row 20: Repeat decrease row 1 [ 31 (37) ]
If you make size XL continue like this:
Only for size XL:
Row 21: 1 hdc in each st across, ch 1, turn [ 37 ]
Row 22: Repeat decrease row 1 [ 35 ]
Row 23: Repeat decrease row 1 [ 33 ]
Only for size 2XL:
Row 14: Repeat decrease row 1 [ 47 ]
Row 15: Repeat decrease row 1 [ 45 ]
Row 16: 1 hdc in each st across, ch 1, turn [ 45 ]
Row 17: Repeat decrease row 1 [ 43 ]
Row 18: Repeat decrease row 1 [ 41 ]
Row 19: Repeat decrease row 1 [ 39 ]
Row 20: Repeat decrease row 1 [ 37 ]
Row 21: 1 hdc in each st across, ch 1, turn [ 37 ]
Row 22: Repeat decrease row 1 [ 35 ]
Row 23: Repeat decrease row 1 [ 33 ]
Only for size 3XL:
Row 14: Repeat decrease row 1 [ 51 ]
Row 15: Repeat decrease row 1 [ 49 ]
Row 16: Repeat decrease row 1 [ 47 ]
Row 17: Repeat decrease row 1 [ 45 ]
Row 18: Repeat decrease row 1 [ 43 ]
Row 19: Repeat decrease row 1 [ 41 ]
Row 20: Repeat decrease row 1 [ 39 ]
Row 21: 1 hdc in each st across, ch 1, turn [ 39 ]
Row 22: Repeat decrease row 1 [ 37 ]
Row 23: Repeat decrease row 1 [ 35 ]
Do not break the yarn. Continue crocheting the ribbing at the wrist of your cardigan.
Ribbing at wrist
Use hook 6 mm.
Ch 9.
Row 1: Start in 2nd ch from hook, 8 sc, 2 sc along the last row of the sleeve, turn.
Row 2: Skip 2 sc, 8 sc blo, ch 1, turn.
Row 3: 8 sc blo, 2 sc along row 20 of the sleeve, ch 1, turn.
Repeat Row 2 and 3 all the way to the end. You end with making row 2.
Break the yarn and weave in all ends.
Assembly
Note! Use only one strand of yarn when you sew.
Start with the body panels
Lay the front panels on top of the back panel as the illustration below shows. Remember, there are no right or wrong sides of your panels. Just make sure to choose the same side of all the panels as the right and wrong side.
Thread a darning needle with a piece of yarn, approx. 40” / 100 cm. Whip stitch shoulder seams together.
The side you sew on is now your wrong side of your cardigan and you’ll be crocheting on this side from now on. Mark the right side with a stitch marker.


Attaching the sleeves
Sew on the wrong side.
Find the middle of your sleeves and mark it with a stitch marker. Make sure that the middle of the sleeves are exactly where the shoulders are sewn together.
Thread the needle with a leftover piece of yarn, approx. 40” / 100 cm.
Whip stitch the sleeves on as the illustration shows.

Sewing sleeves and sides
Sew on the wrong side.
Fold your crochet cardigan as the illustration shows. Thread the needle with a piece of yarn, approx. 110” / 280 cm.
Start at the wrist. Whip stitch the sleeves and the body panels.
Turn your work inside out. The stitch markers on the right side of your work should now be visible to you.
Work on the right side from now on.

Ribbing at bottom of your crochet cardigan
Work with two strands of yarn.
Work on the right side. Use hook 6 mm.
Add the yarn at the beginning of left front piece.
Ch 9.
Row 1: Start in 2nd ch from hook, 8 sc, 1 sc along the bottom, turn.
Row 2: Skip 1 sc, 8 sc blo, ch 1, turn.
Row 3: 8 sc blo, 2 sc along the bottom, turn.
Row 4: Skip 2 sc, 8 sc blo, ch 1, turn.
Row 5: 8 sc blo, 1 sc along the bottom, turn.
Repeat Row 2 to 5 all the way around the bottom. You end with making either row 2 or 4, but do not ch 1.
Break the yarn and weave in all ends.
Continue making the neckline ribbing.
NECKLINE RIBBING
Work with two strands of yarn.
Use hook 6 mm.
Ch 6.
Row 1: Start in 2nd ch from hook, 5 sc, ch 1, turn.
Row 2: 5 sc in blo, ch 1, turn.
Repeat Row 2 until the ribbing measures the length of the entire neckline.
Break the yarn and weave in ends.
ATTACHING NECKLINE RIBBING
Note! Use only one strand of yarn when you sew.
Sew on the right side.
Lay your cardigan flat as the illustration shows and pin the ribbing along the neckline.
Whip stitch the ribbing to the neckline. Make sure not to pull the ribbing as you sew to get a nice and even look.
Weave in all your ends.

POCKETS – optional
You start by making the ribbing along the pocket.
Work with two strands of yarn.
Make 2. Use hook 7 mm.
Ch 6.
Row 1: Start in 2nd ch from hook, 5 sc, ch 1, turn.
Row 2: 5 sc in blo, ch 1, turn.
Repeat Row 2 until you have a total of 25 (25) 25 (27) 27 (29) rows
Do not break the yarn.
Continue making the rest of the pocket. Work along the edge of your pocket ribbing.
Ch 1 (counts as 1 hdc)
Row 1: Divide 17 (17) 17 (19) 19 (21) hdc evenly along the edge of the ribbing. Make sure that your work does not wrinkle. Ch 1, turn [ 18 (18) 18 (20) 20 (22) ]
Row 2: Hdc in each st across, ch 1, turn [18, (18) 18 (20) 20 (22) ]
Repeat Row 2 until you have a total of 10 (10) 10 (11) 11 (12) rows
ATTACHING POCKETS
Now try on your almost finished crochet cardigan to check where your pockets should be placed. Relax your arms and hands. You’d want to attach the pockets where your hands are on the front panels.
Pin the pockets to the right side of the cardigan. You can also use stitch markers.
Note! Use only one strand of yarn when you sew.
Whip stitch the pockets to the cardigan. Make sure only to stitch through the front panel of the cardigan and not to sew the pocket through both the front and back panels.
Now weave in all ends and remove all stitch markers.

Share your finished long crochet cardigan
Happy crocheting! 🧶✨
xx Sharlene
If you enjoyed this pattern, you may also like these patterns:
- The Star Cluster Tee – Cute crochet summer top
- The Cadence Cardigan – Gorgeous color block cardi
- Everyday Easy Crochet Cardigan – Perfect for beginners
- The bubblelicious Hubba Bubba Cardigan
- Monday Sweater – Chunky and cozy
Follow me:
Sharing is caring:
Haha, this Milani Cardigan pattern looks wonderfully cozy and超 easy for a beginner like me! The step-by-step guide is super helpful, and the fact that it uses only basic stitches makes my crafting heart do a little dance! 😊 The detailed size guide and gauge instructions are a lifesaver, ensuring my cardigan wont be too snug or too baggy (fingers crossed!). Cant wait to dive into the body panels – maybe Ill add a few extra rows for ultimate comfort! Thanks for the clear instructions and the call to share projects; Im definitely tagging @yippieyarnyay! 🧶✨